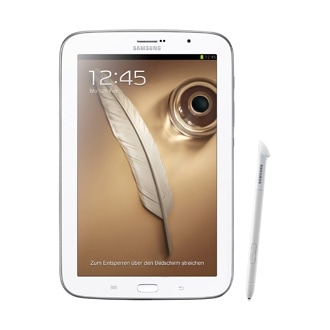
Showing posts with label galaxy. Show all posts

How To Upgrade OS Android Samsung Galaxy Fit from Froyo to Gingerbread

Upgrade OS Android

How To Upgrade OS Android Samsung Galaxy Fit from Froyo to Gingerbread?


Since you do not understand everything about how to upgrade the OS to Android, the post I will discuss on How to Upgrade OS Android Samsung Galaxy Fit from Froyo to Gingerbread?

What is OS? OS is an Operating System that is used on a device, such as Android we are discussing today. In addition to Android there are also Windows, Linux, etc. that I can not mention one by one. Well, but is it possible for us to upgrade it? Whats own upgrade? Upgrade is a step in which we will enhance the ability of the OS we are using today to a newer operating sysytem, in this case I upgrade from OS Froyo to Gingerbread for Samsung Galaxy Fit S5670.

Steps Upgrade OS Android Samsung Galaxy Fit from Froyo to Gingerbread:
1. Prepare in advance the tools we need. As ODIN Multidownloader, File .ops, and firmware that we use.
2. If you do not already have it, please download ODIN Multidownloader and file .Ops for Samsung Galaxy Fit here
(for file .opsnya different for each devices). For the firmware you can find yourself well. Here I only explain a few steps alone.
3. After you download all the equipment, first open your Multidownloader ODIN. Then insert the file .Ops in place, and check One Package (if you use the One Package, if not leave it alone).
4. Then Enter the firmware into place, (File firmware berkestensi. Tar, if still in the first extract rar please.)
5. Then once everything is ready, plug the phone.
Download your favorite Android in by pressing the Mode Down, Home, Power simultaneously. After appearing in yellow on the upper left Multidownloader ODIN and it was a sign already detect it, please click on START
6. Never unplug the cable from your computer, because it would thwart the upgrade process and the risks that occur on their own responsibility.
7. Wait until the process is complete. Highlighted in yellow on the upper left ODIN became blue. Completed.


Android Apk
Read More..

How to upgrade official firmware on Samsung Galaxy S II I9100

If you are a new user of Samsung Galaxy S II I9100 and you wanted to upgrade your phones firmware to any latest updates, all you need is a personal computer or laptop and install a software program called KIES, you can download it via Samsung official support.
You cant do it over the air or OTA like any other android smartphones by using software update option, Yes you can see a software update option in phone under settings and you need to specify your samsung account details as well.. but  as of now its doesnt work on Samsung Galaxy S II I9100.

Aside from Kies update you can also manually upgrade the device by a way of using ODIN downloader tool and an original firmware.

Samsung Galaxy S2 upgrade firmware
This method is  not recommended for beginners since it will cause some problems and sometimes mess up the phone, called bricking.

If you want to learn by this method you may visit XDA-developer, many advance users in there shares a useful tweaks and tips about Samsung Galaxy S II I900 firmware.


Android Apk
Read More..

How to Hard Reset Samsung Galaxy phones

Do you want to reset your galaxy phone default factory settings.

How to reset.....??????
Go...select... press......press and hold.....type this .......etc....ok

Dont worry. It is simple. I explain how to it works.
Hard reset you phone delete, lose your personal data. First of all charge your phone batter and backup your important, personal data.
Take out your SIM card and SD card.

To reset your phone dial this code   *2767*3855#

Wait until finishing reset and automatically reboot phone. Do not press any buttons, do not touch any place will reset and reboot.
Now your phone is reset default factory settings. This code is work most samsung phones reset.


Android Apk
Read More..

Samsung Galaxy Core Advance with physical button again

Samsung Galaxy Core Advance specifications and images are out and it shows Samsung has brought back the hardware button to its devices.Samsung has been lunching many android devices but they come with touch control buttons but now they launch Samsung Galaxy Core Advance with physical hardware button and below is the specifications of Samsung Galaxy Core Advance

Samsung Galaxy Core Advance with physical button again


Specifications and features of Samsung Galaxy Core Advance:

4.7 TFT dispaly with WVGA resolution
1.2 GHz dual core processor
1 GB of RAM
8GB of internal memory

5 MP Rear camera
VGA front camera
Android 4.2 jelly bean OS
2000 mAh battery


Samsung Galaxy Core Advance with physical button again


Samsung Galaxy Core Advance will be available from January 2014 in two different colors

Search results :
Samsung Galaxy Core Advance specifications
Samsung Galaxy Core Advance features
Samsung Galaxy Core Advance images
galaxy core advance specs
galaxy core advance price
galaxy core advance release date


Android Apk
Read More..

How to Connect Internet From Galaxy y Phone To PC or Laptop


"Hi Friends,
Please advise me How to connect my galaxy y phone internet to my PC using the Data cable."

This is my Friends E-mail. Most my friends ask me how to connect  internet From android phone to PC or laptop. It is simple, You can follow below simple steps.

  • : Install SAMSUNG Kies Software Your PC or Laptop.
  • : Connect your android phone to PC or Laptop using Data cable.
  • : Go to your Android phone Menu > Settings > Wireless and Networks 
  • : Select Mobile Networks > Tic Use packet data 
  • : Select Tethering and portable hotspot > Tic USB tethering
Now you can see your status bar blue icon and HSDPA icon. Now your android phone connected to internet. You can internet your PC or Laptop. Browsing and enjoy.  


Android Apk
Read More..

How to Free up Internal Memory on Samsung Galaxy Ace

Heres a simple tips on Samsung Galaxy Ace that help how to free up internal memory with just one click. All you need to have is a rooted Samsung Galaxy Ace and install and used this application called "Gemini App Manager" its Free and already proven works and tried myself.


This "Gemini App Manager"can move application such as facebook, twitter etc.  This also move maps but
my experience I say dont move Maps as its system application and needs to acess gps,wifi and many other system rescources so leave it on internal memory bcoz if u forecfully moved map, it will become unfuntional of no use, so leave it as it is

Features of this application:
Show app information (including risk info, e.g. show which app can call outgoing, or can send out SMS, or can use Camera, or can find your location (GPS), etc),
Autorun management (enable/disable conditions for autorun),
Kill process (one key RAM optimize, kill all, or kill by selection),
Move/batch move apps from phone to SD card(Android 2.2 or later),
Move/batch move apps from SD card to phone(Android 2.2 or later),
Uninstall/batch uninstall apps,
View application details
Clear app cache,
View app on market,
Sort apps by multi ways,
Filter apps by multi ways,

Grab the application here:
http://www.appbrain.com/app/gemini-app-manager/com.seasmind.android.gmappmgr


Android Apk
Read More..

Samsung announces Galaxy Tab for students

Apparently following the more is more philosophy, Samsung USA has revealed that they will be releasing a Galaxy Tab designed for education.

Available for grades Kindergarten through 12th grade, the education-centric tablet will give students access to specific content created for digital instruction.The tab has been created in coordination with the Google Play for Education program.
We don’t have the nitty-gritty on the “Edu-Tab’s” tech specs yet, but we do know it’ll rock a 10.1” WXGA screen with a 16:10 aspect ratio, and will have WiFi, a dual-camera set-up, NFC, and Android 4.4, Kit-Kat, right out of the box.
The content that will be pre-loaded on the tablet will all be teacher approved as part of the Google Play for Education program. Additional apps can be purchased with a school PO instead of a customary credit card, as well.
Are you an educator that wants to get this tablet in the hands of your students? You’ll have to wait until April, when the slate drops, to do so.
Source


Android Apk
Read More..

ROM Lenox Evolution V2 2 GALAXY Y

Lenox Evolution V2 merupakan custom rom untuk pengguna Galaxy Y GT-S5360, yang saya ketahui bahwa custom rom tersebut hasil karya salah satu member xda.
Download Links:
1. CWM-Madteam-Galaxy-Y.zip
2. ROM LenoxEvoV2-SIGNED.zip

Langkah-langkah:

1. Copy kedua file tersebut, ke root sdcard/Here.
2. Matikan HH anda.
3. Tekan Power + Volume Up + Home secara bersamaan, sampai muncul boot samsung galaxy y gt-s5360, lalu lepaskan.
4. Setelah itu tampilan HH anda akan memasuki mode Android System Recovery.
5. Pada mode Android System Recovery, Pilih apply update from sdcard.
6. Cari file CWM-Madteam-Galaxy-Y.zip
7. Pada mode ClockworkMod Recovery (CWM).
8. Pilih wipe data/factory reset.
9. Pilih wipe cache/partition.
10. Pilih mounts and storage, mount system, data, cache (terlihat unmount).
11. Pilih install zip from sdcard
12. Pilih choose zip from sdcard
13. Cari file LenoxEvolutionV2-SIGNED.zip
14. Pilih Yes-Install.
15. Setelah selesai, reboot system now (Pertama reebot memang agak lama).

Update Lenox Evolution V 2.1:
1. LenoxEvolutionV2.1[UPDATE]-SIGNED.zip
2. Flash via CWM, mount system, data, cache (terlihat unmount).


Update Lenox Evolution V 2.1.1
1. LenoxEvolutionV2.1.1[FIX]-SIGNED.zip
2. Flash via CWM, mount system, data, cache (terlihat unmount).

Update Lenox Evolution V 2.2:
1. LenoxEvolutionV2.2[UPDATESandFIX]-SIGNED.zip
2. Flash via CWM, mount system, data, cache (terlihat unmount).

Installation Video:

Screenshot:


Catatan: Lenox Evolution V2 beserta update & Fix ini, sudah saya test di Samsung Galaxy Y GT-S5360, work 100%...


Perhatian: Saya Tidak bertanggung jawab jika setelah menggunakan tutorial ini ada kesalahan yang menyebabkan smartphone android anda mati/brick/error, karena tutorial ini sudah saya coba 100% berhasil.

Original Thread XDA: http://forum.xda-developers.com/showthread.php?t=2462914
Read More..

How to Root Galaxy Note 2 N7100 on Android 4 1 2 XXDMG1 Jelly Bean Firmware

Samsung has released its latest Android 4.1.2 Jelly Bean update with firmware build number N7100XXDMG1 for the international version of Samsung Galaxy Note 2 bearing model number GT-N7100.

Samsung Galaxy Note 2 N7100 users who have already updated their devices with Android 4.1.2 XXDMG1 Jelly Bean, may root their devices using the tutorial below.

This tutorial uses CF-Auto-Root file released by recognised XDA Developers, Chainfire. The CF-Auto-Root file allowing Galaxy Note 2 users to root their devices easily without depending on the firmware. It completely supports Android 4.1.2 Jelly Bean and future firmware as well. Head over to the CF-Auto-Root main thread to learn more about the root method.

Note: Using this root increases your flash counter. The flash counter keeps track of how many custom firmwares you have flashed, as this voids warranty. Triangle Away can be used to reset the flash counter after installing CF-Auto-Root.

Disclaimer: Rooting voids the warranty of your device. We and the developer of this rooting procedures shall not be held responsible if any undesirable outcomes may happen to your device. use of this root guide is solely at your own risk!

Pre-requisites
1. Install USB Drivers for Samsung Galaxy Note 2 on the computer.
2. Enable USB Debugging Mode on the phone by navigating to Settings >> Developer Options.
3. Make a backup of all your important data before following the guide.
4. The Galaxy Note 2 should be factory unlocked and not locked to any particular carrier.
5. Ensure the battery of the phone is charged more than 80 per cent.
6. The CF-Auto-Root file works only on Samsung Galaxy Note 2 N7100. Applying these to any incorrect variant might brick the device. Verify the model number of the Galaxy Note 2 by navigating to Settings >> About Phone.

Files Required
1. CF-Auto-Root for Galaxy Note 2 N7100 (CF-Auto-Root-t03g-t03gxx-gtn7100.zip)
2. Odin 3.07 (Mirror Link)

Steps to Root Galaxy Note 2 N7100 Running on Android 4.1.2 XXDMG1 Jelly Bean Firmware
Step 1: Extract CF-Auto-Root and Odin 3.07 files using WinRAR/7-Zip/WinZip or any other extracting tool.
Step 2: Switch off the Galaxy Note 2. Then boot the device into Download Mode by pressing and holding Volume DownHome and Power buttons together until a construction Android robot icon with a warning triangle appears on screen. Now press the Volume Up button to enter Download Mode.
Step 3: Launch Odin on the computer as an Administrator.
Step 4: Connect the Galaxy Note 2 to the computer using USB cable while it is in the Download Mode. Wait until Odin detects the device. When the device is connected successfully, the ID: COM box will turn blue with the COM port number. Additionally, the successful connected will be indicated by a message saying Added.
Note: If the Added message does not appear, then try re-install USB drivers or changing the port on the computer.
Step 5: In Odin, click the PDA button and select the CF-Auto-Root-t03g-t03gxx-gtn7100.tar.md5 file.
Step 6: Verify that Auto Reboot and F.Reset Time checkboxes are selected in Odin. Also, ensure the Re-Partition option is not selected.
Step 7: Double-check and click Start in Odin. The installation process will now begin.
Step 8: Once the installation process is completed, your phone will restart and soon you will see a PASS message with green background in the left-most box at the very top of the Odin. You can now unplug the USB cable to disconnect your device from computer.

Samsung Galaxy Note 2 N7100 running on Android 4.1.2 XXDMG1 Jelly Bean firmware is now rooted successfully. You can now install any app that requires root permission. Verify the root status of the device by downloading Root Checker app from Google Play Store.

Thanks to all fellas at XDA who first tried out this rooting technique. This root method was originally posted via XDA-Developer original thread.
Read More..

How to Update Galaxy Note 8 0 N5100 with Android 4 2 2 XXCMH1 Jelly Bean Official Firmware

Good news for the Samsung Galaxy Note 8.0 owners, Following the LTE variant of Galaxy Note 8.0 (GT-N5120), Samsung has started rolling out the official Android 4.2.2 Jelly Bean update for the international 3G version of Galaxy Note 8.0 (GT-N5100).

Firmware details
PDA: N5100XXCMH1
CSC: N5100OXACMH1
MODEM: N5100XXCMF4
Version: Android 4.2.2
Built date: Aug 01, 2013
Regions: Germany

This update brings some new stuff on the Galaxy Note 8.0 such as lockscreen widgets, dedicated toggles menu in status bar, improved task switching, Daydream screensaver mode, and performance enhancements.

The new official firmware is now available as an Over-The-Air (OTA) update as well as through Samsung KIES. However, those who missed the OTA update notification or unable to access the update over Samsung KIES, and those who are residing outside Germany can now download and install the same manually, using our step-by-step guide.

Pre-requisites
1. Install USB Drivers for Samsung Galaxy Note 8.0 on the computer.
2. Enable USB Debugging Mode on the phone by navigating to Settings >> Developer Options.
3. Make a backup of all your important data before following the guide.
4. The Galaxy Note 8.0 should be factory unlocked and not locked to any particular carrier.
5. Ensure the battery of the phone is charged more than 80 per cent.
6. The Android 4.2.2 XXCMH1 Jelly Bean firmware is compatible only with Samsung Galaxy Note 8.0 N5100. Applying this to any incorrect variant might brick the device. Verify the model number of the Galaxy Note 8.0 by navigating to Settings >> About Phone.

Files Required
1. Android 4.2.2 XXCMH1 Jelly Bean Firmware (Mirror Link 1, Link 2)
2. Odin 3.07 (Mirror Link)

Steps to Update Galaxy Note 8.0 N5100 with Android 4.2.2 XXCMH1 Jelly Bean Firmware
Step 1: Extract Firmware zip file using WinRAR/7-Zip/WinZip or any other extracting tool, you will get a .tar.md5 file and some other files (optional).
Step 2: Extract Odin zip file and you will get Odin3 v3.07.exe along with few other files.
Step 3: Power off your phone.
Step 4: Boot the device into Download Mode by pressing and holding Volume Down, Home and Power buttons together until a construction Android robot icon with a warning triangle appears on screen. Now press the Volume Up button to enter Download Mode.
Step 5: Run Odin on the computer as an Administrator.
Step 6: Connect the Galaxy Note 8.0 to the computer using USB cable while it is in the Download Mode. Wait until Odin detects the device. When the device is connected successfully, the ID: COM box will turn blue with the COM port number. Additionally, the successful connected will be indicated by a message saying Added.

Note: If the Added message does not appear, then try re-install USB drivers or changing the port on the computer.

Step 7: Choose the following files in Odin from extracted N5100XXCMH1 firmware folder by using respective checkboxes:
  • Select the PDA checkbox, and choose the file named .tar or .md5.
  • Click the Phone checkbox, and choose the file with modem in its name (ignore if there is no such file)
  • Click the CSC checkbox, and select the file with csc in its name (ignore if such file is missing)
  • Choose the PIT checkbox, and choose the .pit file. Use only the file obtained during extracting in step 1 above, otherwise ignore it.
Step 8: In Odin, enable Auto Reboot and F. Reset Time checkboxes. Also, ensure the Re-Partition checkbox is chosen only if a .pit file was chosen in the previous step.
Step 9: Verify everything suggested in Step 7 and Step 8 is done correctly. Then hit the Start button to begin the installation process.
Step 10: Once the installation process is completed, your phone will restart and soon you will see a PASS message with green background in the left-most box at the very top of the Odin. You can now unplug the USB cable to disconnect your device from computer.

Samsung Galaxy Note 8.0 N5100 should be now updated with official Android 4.2.2 XXCMH1 Jelly Bean. Head over to Settings >> About Phone to verify the software version running on the device.

Note: If Galaxy Note 8.0 N5100 stuck at booting animation after Step 10 then go to recovery mode (press and hold the Volume Up, Home and Power buttons together) and perform Wipe data/Factory Reset and Wipe Cache Partition task before selecting reboot system now function. In recovery mode use Volume keys to navigate between options and Power key to select the option. Please note, performing wiping task will erase your device internal memory data and not external SD card data.
Read More..

How to Update Galaxy Star Pro S7262 with Android 4 1 2 XXUAML1 Jelly Bean Official Firmware

Samsung Galaxy Star Pro with model number GT-S7262 has received another Android 4.1.2 Jelly Bean update with firmware build number S7262XXUAML1. The new official firmware is now available as an Over-The-Air (OTA) update as well as through Samsung KIES.

Firmware details
PDA: S7262XXUAML1
CSC: S7262ODDAMK2
MODEM: S7262XXUAMK2
Version: Android 4.1.2
Build date: Dec 02, 2013
Regions: India, Nepal, Sri Lanka, Bangladesh

Samsung Galaxy Star Pro S7262 users who missed the OTA update notification or unable to access the update over Samsung KIES, can now download and install the same manually using our step-by-step guide.

Pre-requisites
1. Install USB Drivers for Samsung Galaxy Star Pro on the computer.
2. Enable USB Debugging Mode on the phone by navigating to Settings >> Developer Options.
3. Make a backup of all your important data before following the guide.
4. The Galaxy Star Pro should be factory unlocked and not locked to any particular carrier.
5. Ensure the battery of the phone is charged more than 80 percent.
6. The Android 4.1.2 XXUAML1 Jelly Bean firmware is compatible only with the Samsung Galaxy Star Pro (GT-S7262). Applying this to any incorrect variant might brick the device. Verify the model number of the Galaxy Star Pro by navigating to Settings >> About Phone.

Files Required
1. Android 4.1.2 XXUAML1 Jelly Bean Firmware (Mirror Link) for Galaxy Star Pro S7262
2. Odin 3.07 (Mirror Link)

Steps to Update Galaxy Star Pro S7262 with Android Android 4.1.2 XXUAML1 Jelly Bean Firmware
Step 1: Extract Firmware zip file using WinRAR/7-Zip/WinZip or any other extracting tool, you will get a .tar.md5 file and some other files (optional).
Step 2: Extract Odin zip file and you will get Odin3 v3.07.exe along with few other files.
Step 3: Switch off the Galaxy Star Pro.
Step 4: Boot the device into Download Mode by pressing and holding Volume Down, Home and Power buttons together until a construction Android robot icon with a warning triangle appears on screen. Now press the Volume Up button to enter Download Mode.
Step 5: Run Odin on the computer as an Administrator.
Step 6: Connect the Galaxy Star Pro to the computer using USB cable while it is in the Download Mode. Wait until Odin detects the device. When the device is connected successfully, the ID: COM box will turn to light blue with the COM port number. Additionally, the successful connected will be indicated by a message saying Added.

Note: If the Added message does not appear, then try re-install USB drivers or changing the port on the computer.

Step 7: Select the following files in Odin from extracted S7262XXUAML1 firmware folder:
  • Click the PDA button and select the .tar.md5 file.
  • Click the Phone button and select file with MODEM in its name. Ignore if there is no such file.
  • Click the CSC button and select file with CSC in its name. Ignore if there is no such file.
  • Click the PIT button and select the .pit file. Ignore if there is no such file.
Step 8: In Odin, enable Auto Reboot and F. Reset Time checkboxes. Also, ensure the Re-Partition checkbox is chosen only if a .pit file was chosen in the previous step.
Step 9: Verify everything suggested in Step 7 and Step 8 is done correctly. Then hit the Start button to begin the installation process.
Step 10: Once the installation process is completed, your phone will restart and soon you will see a PASS message with green background in the left-most box at the very top of the Odin. You can now unplug the USB cable to disconnect your device from the computer.

Samsung Galaxy Star Pro S7262 should be now updated with official Android 4.1.2 XXUAML1 Jelly Bean. Head over to Settings >> About Phone to verify the software version running on the device.

Note: If Galaxy Star Pro S7262 stuck at booting animation after Step 10 then go to recovery mode (press and hold the Volume Up, Home and Power buttons together) and perform Wipe data/Factory Reset and Wipe Cache Partition task before selecting reboot system now function. In recovery mode use Volume keys to navigate between options and Power key to select the option. Please note, performing wiping task will erase your device internal memory data and not external SD card data.
Read More..

How to Update Galaxy S3 T Mobile SGH T999 with Android 4 1 2 UVDMD5 Jelly Bean Official Firmware

Samsung recently released Android 4.1.2 Jelly Bean firmware update for the T-Mobile subscribers of Galaxy S3 bearing model number SGH-T999. The new official firmware is now available as an Over-The-Air (OTA) update as well as through Samsung KIES.

Firmware details
PDA: T999UVDMD5
CSC: T999TMBDMD5
MODEM: T999UVDMD5
Version: Android 4.1.2
Built date: Apr 15, 2013
Regions: U.S. (T-Mobile)

Samsung Galaxy S3 (T-Mobile) SGH-T999 users who missed the OTA update notification or unable to access the update over Samsung KIES, may follow our step-by-step guide to install the update manually.

Pre-requisites
1. Install USB Driver for Samsung Galaxy S3 (T-Mobile) on the computer.
2. Enable USB Debugging Mode on the phone by navigating to Settings >> Developer Options.
3. Make a backup of all your important data before following the guide.
4. Ensure the battery of the phone is charged more than 80 per cent.
5. The Android 4.1.2 UVDMD5 Jelly Bean firmware is compatible only with Galaxy S3 (T-Mobile) SGH-T999. Applying this to any incorrect variant might brick the device. Verify the model number of the Galaxy S3 (T-Mobile) by navigating to Settings >> About Phone.

Files Required
1. Android 4.1.2 UVDMD5 Jelly Bean Firmware for Galaxy S3 (T-Mobile) SGH-T999
2. Odin 3.07

Steps to Update Galaxy S3 (T-Mobile) SGH-T999 with Android 4.1.2 UVDMD5 Jelly Bean Firmware
Step 1: Extract Firmware zip file that you downloaded already from above link using WinRAR/7-Zip/WinZip or any other extracting tool, you will get a .tar.md5 file and some other files.
Step 2: Extract Odin zip file and you will get Odin3 v3.07.exe along with few other files.
Step 3: Power off your phone. Wait 5-6 seconds for vibration to confirm complete switch off.
Step 4: Boot the device into Download Mode by pressing and holding Volume Down + Home buttons together and then press the Power button until the device turns on. Now press the Volume Up button to enter Download Mode.
Step 5: Run Odin on the computer as an Administrator.
Step 6: Connect the Galaxy S3 (T-Mobile) to the computer using USB cable while it is in the Download Mode. Wait until Odin detects the device. When the device is connected successfully, the ID: COM box will turn yellow with the COM port number. Additionally, the successful connected will be indicated by a message saying Added.
Step 7: Choose the following files in Odin from extracted T999UVDMD5 firmware folder by using respective checkboxes:
  • Select the PDA checkbox, and choose the file named .tar or .md5.
  • Click the Phone checkbox, and choose the file with modem in its name (ignore if there is no such file)
  • Click the CSC checkbox, and select the file with csc in its name (ignore if such file is missing)
  • Choose the PIT checkbox, and choose the .pit file. Use only the file obtained during extracting in step 1 above, otherwise ignore it.
Step 8: In Odin, enable Auto Reboot and F. Reset Time checkboxes. Also, ensure the Re-Partition checkbox is chosen only if a .pit file was chosen in the previous step.
Step 9: Verify everything suggested in Step 7 and Step 8 is done correctly. Then hit the START button to begin the installation process.
Step 10: Once the installation process is completed, your phone will restart and soon you will see a PASS message with green background in the left-most box at the very top of the Odin. You can now unplug the USB cable to disconnect your device from computer.

Samsung Galaxy S3 (T-Mobile) SGH-T999 should be now updated with official Android 4.1.2 UVDMD5 Jelly Bean firmware. Head over to Settings >> About Phone to verify the software version running on the device.

Note: If Galaxy S3 (T-Mobile) SGH-T999 stuck at booting animation after Step 10 then go to recovery mode (press and hold the Volume Up, Home and Power buttons together) and perform Wipe data/Factory Reset and Wipe Cache Partition task before selecting reboot system now function. In recovery mode use Volume keys to navigate between options and Power key to select the option. Please note, performing wiping task will erase your device internal memory data and not external SD card data.
Read More..

How to Update Galaxy Grand Duos I9082 with Android 4 2 2 XXUBMK7 Jelly Bean Official Firmware

Samsung has just released a new software update for the Galaxy Grand Duos (GT-I9082). This latest update is still based on Android 4.2.2 Jelly Bean and now available in Southeast Asian countries as an Over-The-Air (OTA) update as well as through Samsung KIES.

Firmware details
PDA: I9082XXUBMK7
CSC: I9082OLBBMK1
MODEM: I9082DXUBMI1
Version: Android 4.2.2
Build date: Nov 26, 2013
Regions: Indonesia, Malaysia, Philippines, Singapore, Vietnam, Thailand

Samsung Galaxy Grand Duos I9082 users who missed the OTA update notification or unable to access the update over Samsung KIES, may follow our step-by-step guide to install the update manually.

Pre-requisites
1. Install USB Drivers for Samsung Galaxy Grand Duos on the computer.
2. Enable USB Debugging Mode on the phone by navigating to Settings >> Developer Options.
3. Make a backup of all your important data before following the guide.
4. The Galaxy Grand Duos should be factory unlocked and not locked to any particular carrier.
5. Ensure the battery of the phone is charged more than 80 percent.
6. The Android 4.2.2 XXUBMK7 Jelly Bean firmware is compatible only with the Samsung Galaxy Grand Duos (GT-I9082). Applying this to any incorrect variant might brick the device. Verify the model number of the Galaxy Grand Duos by navigating to Settings >> About Phone.

Files Required
1. Android 4.2.2 XXUBMK7 Jelly Bean Firmware (Mirror Link 1, Link 2)
2. Odin 3.07 (Mirror Link)

Steps to Update Galaxy Grand Duos I9082 with Android 4.2.2 XXUBMK7 Jelly Bean Firmware
Step 1: Extract Firmware zip file using WinRAR/7-Zip/WinZip or any other extracting tool, you will get a .tar.md5 file and some other files (optional).
Step 2: Extract Odin zip file and you will get Odin3 v3.07.exe along with few other files.
Step 3: Switch off the Galaxy Grand Duos.
Step 4: Boot the device into Download Mode by pressing and holding Volume Down, Home and Power buttons together until a construction Android robot icon with a warning triangle appears on screen. Now press the Volume Up button to enter Download Mode.
Step 5: Run Odin on the computer as an Administrator.
Step 6: Connect the Galaxy Grand Duos to the computer using USB cable while it is in the Download Mode. Wait until Odin detects the device. When the device is connected successfully, the ID: COM box will turn to light blue with the COM port number. Additionally, the successful connected will be indicated by a message saying Added.

Note: If the Added message does not appear, then try re-install USB drivers or changing the port on the computer.

Step 7: Select the following files in Odin from extracted I9082XXUBMK7 firmware folder:
  • Click the PDA button and select the .tar.md5 file.
  • Click the Phone button and select file with MODEM in its name. Ignore if there is no such file.
  • Click the CSC button and select file with CSC in its name. Ignore if there is no such file.
  • Click the PIT button and select the .pit file. Ignore if there is no such file.
Step 8: In Odin, enable Auto Reboot and F. Reset Time checkboxes. Also, ensure the Re-Partition checkbox is chosen only if a .pit file was chosen in the previous step.
Step 9: Verify everything suggested in Step 7 and Step 8 is done correctly. Then hit the Start button to begin the installation process.
Step 10: Once the installation process is completed, your phone will restart and soon you will see a PASS message with green background in the left-most box at the very top of the Odin. You can now unplug the USB cable to disconnect your device from the computer.

Samsung Galaxy Grand Duos I9082 should be now updated with official Android 4.2.2 XXUBMK7 Jelly Bean. Head over to Settings >> About Phone to verify the software version running on the device.

Note: If Galaxy Grand Duos I9082 stuck at booting animation after Step 10 then go to recovery mode (press and hold the Volume Up, Home and Power buttons together) and perform Wipe data/Factory Reset and Wipe Cache Partition task before selecting reboot system now function. In recovery mode use Volume keys to navigate between options and Power key to select the option. Please note, performing wiping task will erase your device internal memory data and not external SD card data.
Read More..

How to Update Galaxy Grand Duos I9082 with Android 4 1 2 XXAMD6 Jelly Bean Official Firmware

Samsung has rolled out another official Jelly Bean update, Android 4.1.2 with base firmware XXAMD6, for the international version of Galaxy Grand Duos bearing model number GT-I9082. The new official firmware is now available for download through Samsung KIES as well as Over-The-Air (OTA) update in Southeast Asia countries including Indonesia, Malaysia, Philippines, Singapore,Vietnam and Thailand.

Firmware details
PDA: I9082XXAMD6
CSC: I9082OLBAMD3
Version: Android 4.1.2
Built date: April, 2013
Regions: Indonesia, Malaysia, Philippines, Singapore, Vietnam, Thailand

The Galaxy Grand Duos users who failed to receive the OTA update notification or unable to access the update over Samsung KIES can download and install the same manually, using our step-by-step guide.

Pre-requisites
1. Install USB Driver for Samsung Galaxy Grand Duos on the computer.
2. Enable USB Debugging Mode.
3. Make a backup of all your important data before following the guide.
4. The Galaxy Grand Duos should be factory unlocked and not locked to any particular carrier.
5. Ensure the battery of the phone is charged more than 80 per cent.
6. The Android 4.1.2 XXAMD6 Jelly Bean firmware is compatible only with Samsung Galaxy Grand Duos I9082 and installing this on any incorrect variant will brick the device.

File Required
1. Android 4.1.2 XXAMD6 Jelly Bean Firmware
2. Odin 3.07

Steps to Update Galaxy Grand Duos I9082 with Android 4.1.2 XXAMD6 Jelly Bean Firmware
Step 1: Extract Firmware zip file that you downloaded already from above link, you will get a .tar.md5 file and some other files.
Step 2: Extract Odin zip file and you will get Odin3 v3.07.exe along with few other files.
Step 3: Power off your phone. Wait 5-6 seconds for vibration to confirm complete switch off.
Step 4: Boot the device into Download Mode by pressing and holding Volume Down + Home buttons together and then press the Power button until the device turns on. Now press the Volume Up button to enter Download Mode.
Step 5: Run Odin on the computer.
Step 6: Connect the Galaxy Grand Duos to the computer using USB cable while it is in the Download Mode. Wait until Odin detects the device. When the device is connected successfully, the ID: COM box will turn yellow with the COM port number. Additionally, the successful connected will be indicated by a message saying Added. If Odin fails to detect the device then re-install USB driver.
Step 7: Choose the following files in Odin from extracted I9082XXAMD6 firmware folder by using respective checkboxes:
  • Select the PDA checkbox, and choose the file named .tar or .md5.
  • Click the Phone checkbox, and choose the file with modem in its name (ignore if there is no such file)
  • Click the CSC checkbox, and select the file with csc in its name (ignore if such file is missing)
  • Choose the PIT checkbox, and choose the .pit file. Use only the file obtained during extracting in step 1 above, otherwise ignore it.
Step 8: In Odin, enable Auto Reboot and F. Reset Time checkboxes. Also, ensure the Re-Partition checkbox is chosen only if a .pit file was chosen in the previous step.
Step 9: Verify everything suggested in Step 7 and Step 8 is done correctly. Then hit the START button to begin the flashing process.
Step 10: Once flashing completed, your phone will restart and soon you will see a PASS message with green background in the left-most box at the very top of the Odin. You can now unplug the USB cable to disconnect your device from computer.

Samsung Galaxy Grand Duos I9082 should be now updated with official Android 4.1.2 XXAMD6 Jelly Bean firmware. Head over to Settings>> About Phone to verify the software version running on the device.

Note: If Galaxy Grand Duos I9082 stuck at booting animation after Step 10 then go to recovery mode (press and hold the Volume Up, Home and Power buttons together) and perform Wipe data/Factory Reset and Wipe Cache Partition task before selecting reboot system now function. In recovery mode use Volume keys to navigate between options and Power key to select the option. Please note, performing wiping task will erase your device internal memory data and not external SD card data.
Read More..

How to Update Galaxy Note 8 0 Wi Fi N5110 with Android 4 1 2 XXBMF1 Jelly Bean Official Firmware

UK owners of the Samsung Galaxy Note 8.0 WiFi Only (GT-5110) have received a new Android 4.1.2 Jelly Bean update build number N5110XXBMF1. The new official update is currently available as an Over-The-Air (OTA) update as well as through Samsung KIES.

Firmware details
PDA: N5110XXBMF1
CSC: N5110OXABME5
MODEM: N5110XXBMF1
Version: Android 4.1.2
Built date: Jun 04, 2013
Regions: United Kingdom

Samsung Galaxy Note 8.0 (Wi-Fi) N5110 users who missed the OTA update notification or unable to access the update over Samsung KIES, may follow our step-by-step guide to install the update manually.

Pre-requisites
1. Install USB Driver for Samsung Galaxy Note 8.0 (Wi-Fi) on the computer.
2. Enable USB Debugging Mode on the phone by navigating to Settings >> Developer Options.
3. Make a backup of all your important data before following the guide.
4. Ensure the battery of the phone is charged more than 80 per cent.
5. The Android 4.1.2 XXBMF1 Jelly Bean firmware is compatible only with Samsung Galaxy Note 8.0 (Wi-Fi) N5110. Applying this to any incorrect variant might brick the device. Verify the model number of the Galaxy Note 8.0 (Wi-Fi) by navigating to Settings >> About Phone.

Files Required
1. Android 4.1.2 XXBMF1 Jelly Bean Firmware for Galaxy Note 8.0 (Wi-Fi) N5110
2. Odin 3.07 (Mirror Link)

Steps to Update Galaxy Note 8.0 (Wi-Fi) N5110 with Android 4.1.2 XXBMF1 Jelly Bean Firmware
Step 1: Extract Firmware zip file that you downloaded already from above link using WinRAR/7-Zip/WinZip or any other extracting tool, you will get a .tar.md5 file and some other files.
Step 2: Extract Odin zip file and you will get Odin3 v3.07.exe along with few other files.
Step 3: Power off your phone. Wait 5-6 seconds for vibration to confirm complete switch off.
Step 4: Boot the device into Download Mode by pressing and holding Volume Down + Home buttons together and then press the Power button until the device turns on. Now press the Volume Up button to enter Download Mode.
Step 5: Run Odin on the computer as an Administrator.
Step 6: Connect the Galaxy Note 8.0 (Wi-Fi) to the computer using USB cable while it is in the Download Mode. Wait until Odin detects the device. When the device is connected successfully, the ID: COM box will turn yellow with the COM port number. Additionally, the successful connected will be indicated by a message saying Added. If Odin fails to detect the device then re-install USB driver.
Step 7: Choose the following files in Odin from extracted N5110XXBMF1 firmware folder by using respective checkboxes:
  • Select the PDA checkbox, and choose the file named .tar or .md5.
  • Click the Phone checkbox, and choose the file with modem in its name (ignore if there is no such file)
  • Click the CSC checkbox, and select the file with csc in its name (ignore if such file is missing)
  • Choose the PIT checkbox, and choose the .pit file. Use only the file obtained during extracting in step 1 above, otherwise ignore it.
Step 8: In Odin, enable Auto Reboot and F. Reset Time checkboxes. Also, ensure the Re-Partition checkbox is chosen only if a .pit file was chosen in the previous step.
Step 9: Verify everything suggested in Step 7 and Step 8 is done correctly. Then hit the START button to begin the installation process.
Step 10: Once the installation process is completed, your phone will restart and soon you will see a PASS message with green background in the left-most box at the very top of the Odin. You can now unplug the USB cable to disconnect your device from computer.

Samsung Galaxy Note 8.0 (Wi-Fi) N5110 should be now updated with official Android 4.1.2 XXBMF1 Jelly Bean firmware. Head over to Settings >> About Phone to verify the software version running on the device.

Note: If Galaxy Note 8.0 (Wi-Fi) N5110 stuck at booting animation after Step 10 then go to recovery mode (press and hold the Volume Up, Home and Power buttons together) and perform Wipe data/Factory Reset and Wipe Cache Partition task before selecting reboot system now function. In recovery mode use Volume keys to navigate between options and Power key to select the option. Please note, performing wiping task will erase your device internal memory data and not external SD card data.
Read More..